OpenVPN connection Linux
From IThelp
OpenVPN is a backup solution see VPN for more information
Setup of https://openvpn.net/ on Ubuntu 14.04 LTS
Configuration and certificates To use OpenVPN you need certificates. You can download it from https://tjinfo.uib.no/openvpn
- Sign in with UiB username and password

- Press "Create Certificate".
- You can upload the certificate (configuration file) via the link on the page. Certificate will be emailed as attachment (uib.ovpn)
Installation
Network manager
Network manager does not have OpenVPN installed by default:
- Search the ubuntu software center for "network-manager-openvpn"

- or cut and paste one of the commands below into the terminal and authorize with your password (top:).
$ sudo apt-get install network-manager-openvpn network-manager-openvpn-gnome
</ Pre>
* Let the computer have a restart (reboot) before next step
'Simplest Method:'
* uib.ovpn - file can be imported to network manager:
1. Click the network icon. In the drop-down menu select: Edit connections ...
2. Click Add.
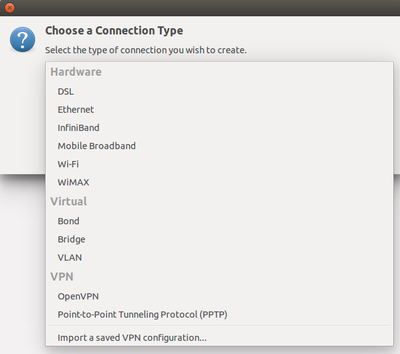
3. In the drop-down menu, select Import a saved VPN configuration. Click Create ...
4. Select the uib.ovpn file
5. A completed layout must be made. You can change the name at the top (default uib)
6. If necessary, enter your username (eg abc123) so that you do not have to enter this when connecting.
'Alternative Method'
* The uib.ovpn file sent by mail from the above must be split into three separate files:
* Open the uib.ovpn file in a word processor
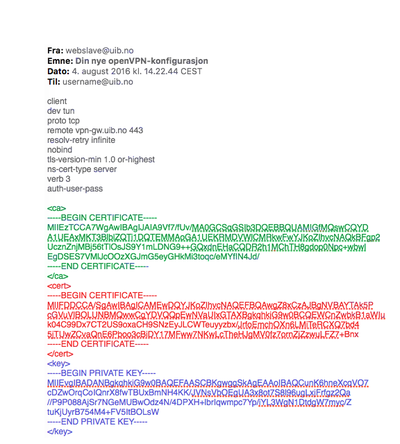 * Copy from <ca> tag through </ca> tag marked in green and paste it into a new text file and save as: OpenVPNCertificatesca.crt
 * Copy from <cert> tag through </cert> tag marked in red and paste it into a new text file and save as: OpenVPNCertificates.crt
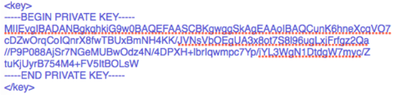
 * Copy from <key> tag through </key> tag marked blue and paste it into a new text file and save as OpenVPNCertificatesca.key
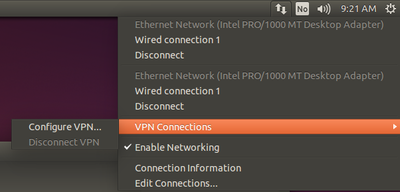
 * Open Network manager, select VPN Connections and Configure VPN
 * Add - Type = OpenVPN

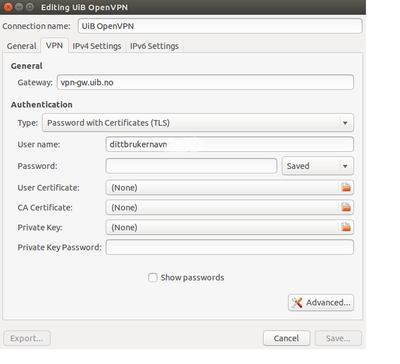
 * Enter the following:
** Connetcion name: UiB OpenVPN
** Gateway: vpn-gw.uib.no
** Type: Password with Certificates (TLS)
** User name: UiB username
** User Certificate: Open OpenVPNCertificates.crt
** CA Certificate: Open OpenVPNCertificatesca.crt
** Private Key: Open OpenVPNCertificatesca.key
* Enter the following:
** Connetcion name: UiB OpenVPN
** Gateway: vpn-gw.uib.no
** Type: Password with Certificates (TLS)
** User name: UiB username
** User Certificate: Open OpenVPNCertificates.crt
** CA Certificate: Open OpenVPNCertificatesca.crt
** Private Key: Open OpenVPNCertificatesca.key
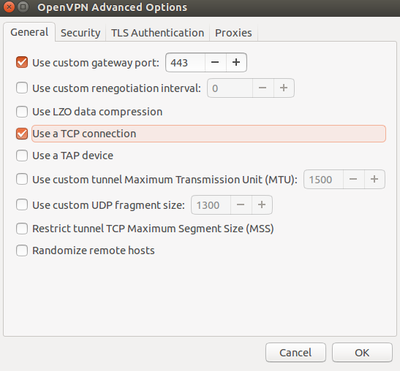
 ** Advanced ...
*** General:
**** Use custom gateway port 443
**** Use a TCP connection (If this fails try without Use a TCP connection)
** Advanced ...
*** General:
**** Use custom gateway port 443
**** Use a TCP connection (If this fails try without Use a TCP connection)
Use
Open the Network manager and select VPN connection and UiB OpenVPN
* Enter UiB password
== == Komandolinje
$ sudo -s
#wget -O - https://swupdate.openvpn.net/repos/repo-public.gpg%7Capt-key add -
#echo "deb http://build.openvpn.net/debian/openvpn/release/2.3 trusty main"> /etc/apt/sources.list.d/openvpn-aptrepo.list
#exit
$ sudo apt-get update
$ sudo apt-get install openvpn
$ sudo openvpn --config uib.ovpn
</ Pre>
Problems and Solutions
In some cases, name server problems may occur after you have connected openvpn. This will feel like no pages can be opened in a browser,
or that services that are internal to UiB cannot be accessed. This can be solved by using UiB's name servers when connecting openvpn. On Ubuntu, you can create a script as shown below to start openvpn, which puts UiB's name servers before it launches openvpn and removes them when openvpn exits.
#! / Bin / bash
echo -n "nameserver 129.177.6.54 \ nnameserver 129.177.12.31" | / sbin / resolvconf -a "bond0.inet"
/ usr / sbin / openvpn --config uib.ovpn
/ sbin / resolvconf -d "bond0.inet"
</ Pre>


