VPN configuration in Windows 7: Difference between revisions
From IThelp
(versjon etter 16.12.17) |
(versjon etter 16.12.17) |
||
| Line 42: | Line 42: | ||
[[File:VPNoppsettStudAns.JPG | [[File:VPNoppsettStudAns.JPG]] | ||
Click "Connect". | Click "Connect". | ||
Revision as of 15:52, 12 December 2017
This page contains a guide for setting up a VPN-connection to UiB in Windows 7
Setting up the connection manually
How to set up the connection for the first time: 1. Click on the "Startbutton" (Windows-icon) in the lower left corner and choose "Control Panel".2. Click "Network and Internet".
3. Click "Set up a new connection or network".
4. Click "Connect to a workplace"
5. Click "Use my Internet connection (VPN)".
6. In the field "Internet adress", type in "vpn-ansatt.uib.no" ("vpn-student.uib.no" if you are a student). In the field "Destination name:" give the connection a name.
Click "Next". 7. In the field "User name", type in your username followed by "@uib.no", In the field "Password", type in your UiB-password.


Click "Connect". 8. Assuming all went well you should get a picture that says you are connected.Disconnecting: 1. Click the icon that looks like a monitor in the lower right corner.
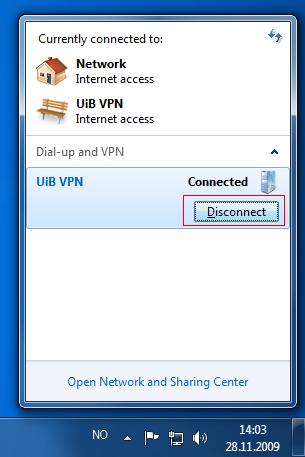
2. You will now see a list with networks that you are connected to. Click the VPN-connection that you are connected to.
3. Click the button "Disconnect".